
「プログラミングを学んでいるけど、何を作ればいいか分からない…」
そんな風に感じているあなたへ。
本記事では、HTMLとJavaScriptだけで作れる「シンプルなカウントダウンタイマー」の作り方を、初心者向けにわかりやすく解説します。
ただコードをコピペするだけで終わらず、「なぜこう書くのか?」という仕組みもしっかり解説。
初めてのWebアプリ制作にぴったりの内容になっているので、楽しく学びながら“自分で動くもの”を作る喜びを体験できます。
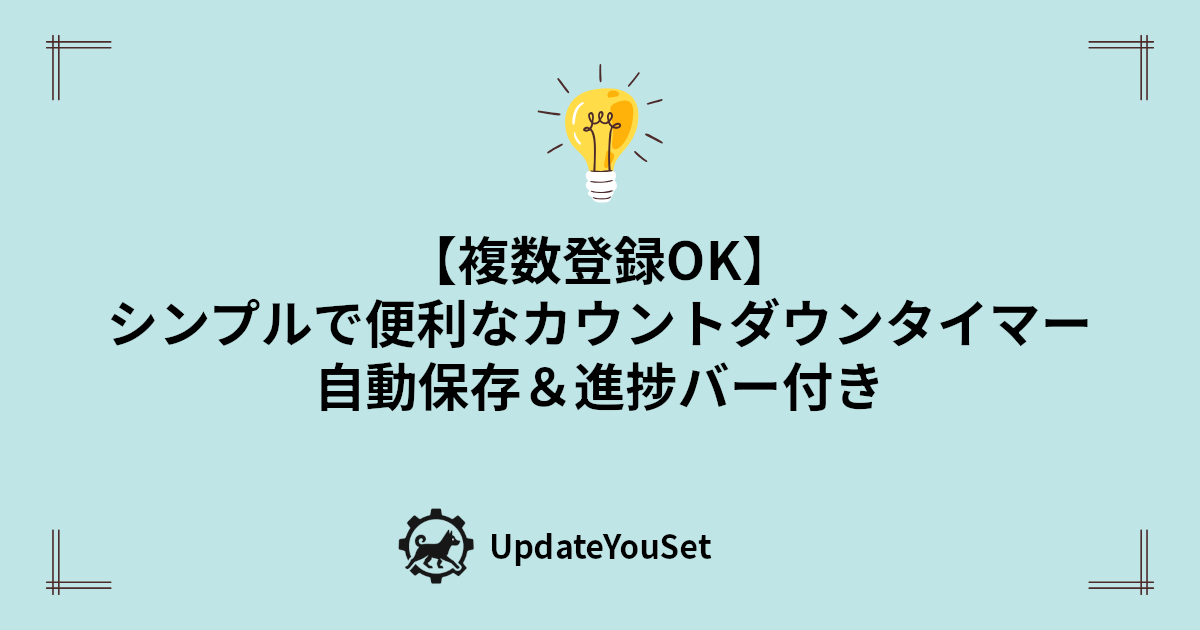
この記事で作るカウントダウンタイマーの仕様
今回一緒に作っていくのは、ただの「時刻を数えるタイマー」ではありません。
目標達成を後押しする、実用性バツグンのWebツールです。
作る前に完成品のイメージをつかんでおけば、仕組みへの理解もスムーズになります。
機能をチェックしながら、あなたの“作ってみたい気持ち”を高めていきましょう!
このツールで実現できること
- リアルタイムで残り時間を表示
目標日までの「○日 ○時間 ○分 ○秒」を常に更新し続けます。毎日のモチベーション維持に最適です。 - 進捗がひと目でわかるプログレスバー
スタート日から目標日までの達成率を、直感的に確認できます。今どれだけ進んでいるかがすぐわかりますよ! - 複数の目標を同時に管理
資格試験・旅行・誕生日など、テーマごとに色分けされるので、見た目もスッキリ。 - ブラウザに自動保存されるから安心
一度登録すればOK。次回アクセスしても、データがそのまま残っています。 - 不要な目標はワンクリックで削除
計画変更や達成済みの目標も、簡単に整理できます。
どんなものができるのか事前に分かるとイメージが湧きますね!

【実際のカウントダウンタイマーの動作を試してみたい方はこちらからどうぞ】▼
Step 0:カウントダウンタイマー開発の準備【HTML&JavaScript初心者向け】
プログラミングを始めるときに「専門ソフトが必要なのでは…?」と思う方も多いかもしれませんが、今回紹介するカウントダウンタイマーの作成には、特別な開発環境は必要ありません。
普段使っているパソコンと無料のエディタ、そしてWebブラウザがあればOK。すぐに始められます!
用意するもの
- パソコン
WindowsでもMacでもOKです。どちらでも同じように作業できます。 - テキストエディタ(コードを書くためのソフト)
以下のいずれかでOKです。- Windows:メモ帳
- Mac:テキストエディット
- 推奨:Visual Studio Code(VS Code)
無料で高機能。初心者でも使いやすく、後々の学習にも役立ちます。
- Webブラウザ(完成後に表示確認するため)
Google Chrome、Microsoft Edge、Firefoxなど、普段使っているものでOKです。
心配しなくて大丈夫。今あなたが使っているパソコンで、そのまま始められますよ!
ファイル作成の手順
- 新しいフォルダーを作成
デスクトップなどに「countdown-tool」など分かりやすい名前のフォルダーを作りましょう。 - index.htmlファイルを作成
そのフォルダーの中に、新しく「index.html」という名前のファイルを作成します。
この1つのHTMLファイル内に、HTML・CSS・JavaScriptをすべて記述していきます。
1つのファイルに全部まとめられるので、迷わず学習できますよ!
Step 1:HTMLでカウントダウンタイマーの土台を作ろう
カウントダウンタイマーを作る最初のステップは、ページの骨組み(HTML)を整えることです。
ここでは、表示するテキストや入力フォームなどの構造を定義します。
HTMLは“家の骨組み”のようなもの。まずはしっかり土台を作ることが大切ですよ!
HTMLコードをindex.htmlに貼り付けよう
以下のコードをすべてコピーして、前のステップで作成した index.html に貼り付けましょう。
|
1 2 3 4 5 6 7 8 9 10 11 12 13 14 15 16 17 18 19 20 21 22 23 24 25 26 27 28 29 30 31 32 33 34 35 36 37 38 39 40 41 42 43 44 45 46 47 48 49 50 51 |
<!DOCTYPE html> <html lang="ja"> <head> <meta charset="UTF-8"> <meta name="viewport" content="width=device-width, initial-scale=1.0"> <title>目標達成応援カウントダウンツール</title> <script src="https://cdn.jsdelivr.net/npm/dayjs@1/dayjs.min.js"></script> <script src="https://cdn.jsdelivr.net/npm/dayjs@1/plugin/duration.js"></script> <script src="https://cdn.jsdelivr.net/npm/dayjs@1/locale/ja.js"></script> <script> dayjs.extend(window.dayjs_plugin_duration); dayjs.locale('ja'); </script> <link rel="stylesheet" href="https://cdn.jsdelivr.net/npm/flatpickr/dist/flatpickr.min.css"> <script src="https://cdn.jsdelivr.net/npm/flatpickr"></script> <script src="https://cdn.jsdelivr.net/npm/flatpickr/dist/l10n/ja.js"></script> <style> </style> </head> <body> <div class="container"> <h1>目標達成応援<br>カウントダウンツール</h1> <p class="description">大切なイベントや目標までの日数をカウントダウンし、モチベーションを保ちましょう!複数の目標を登録・保存できます。</p> <div class="input-form"> <div class="input-group"> <label for="eventName">目標イベント名</label> <input type="text" id="eventName" placeholder="例: 資格試験, 旅行, 誕生日"> </div> <div class="input-group"> <label for="targetDate">目標日</label> <input type="text" id="targetDate" placeholder="日付を選択" readonly> </div> <button onclick="addCountdown()">目標を追加!</button> <p id="error-message">⚠️ 目標イベント名と目標日を入力してください。</p> </div> <div class="countdown-list-container" id="countdown-list-container"> <h2>あなたの目標</h2> <div id="countdown-list"> </div> </div> </div> <script> </script> </body> </html> |
コードのポイント解説
外部ライブラリの読み込み(Day.jsとFlatpickr)
<head>タグ内で、Day.js と Flatpickr という便利なライブラリを読み込んでいます。
- Day.js:日付や時間の計算が簡単にできるようになるライブラリです。
- Flatpickr:カレンダー形式で日付を選べるようにしてくれるライブラリです。
CSSとJavaScriptの書き場所を確保
<style>タグ:ここにCSS(デザインのコード)を書いていきます。<script>タグ:ここにJavaScript(動きのある処理)を書いていきます。
idとclassの使い分け
- id:ページ内で1つだけ使える名前。JavaScriptで個別の操作をするときに使います。
- class:複数の要素に同じスタイルを適用したいときに使います。
このHTMLが、これからCSSとJavaScriptで見た目や動きを加えていくための基盤となります。
HTMLが完成したら、いよいよデザインにチャレンジ!画面がグッと見やすくなりますよ!
Day.jsとFlatpickrって何?カウントダウンに欠かせない2つのライブラリ解説
先ほどのHTMLコードの <head>タグ内には、Day.js と Flatpickr というライブラリを読み込むコードがありました。
これらは、日付や時間の操作をカンタンにしてくれる便利な道具です。
ライブラリというのは、すでに作られた便利な機能の“道具箱”のようなもの。
自分で一から作らなくても、サッと使えるのが魅力です!
Day.jsとは?日付や時間を自由に扱えるライブラリ
JavaScriptだけで日付を扱おうとすると、「何月は何日ある?」「今日から何日後?」など、意外とややこしい計算が必要です。
Day.js を使えば、そうした複雑な処理が驚くほど簡単にできます。
- このツールの役割
- 「目標日まであと○日」のカウントダウンを計算
- 「2025年1月1日」のような日付の表示を整える
カウントダウンツールの“心臓部”ともいえる大事な機能です。精度の高い計算がサクッとできます!
Flatpickrとは?カレンダーで日付を選べるライブラリ
目標日を設定するときに、手で「2025-01-01」と入力するのは面倒ですよね。
Flatpickr を使えば、クリックだけでカレンダーがポップアップして、直感的に日付を選べるUI(ユーザーインターフェース)が手に入ります。
- このツールの役割
- 入力欄をクリックすると、カレンダーが自動表示
- そのまま日付を選択できるようにしてくれる
ライブラリの読み込みってどうするの?
では、これらの便利なライブラリをどのように読み込んでいるのか、HTMLコードの該当部分を確認してみましょう。
Day.jsの読み込み部分▼
|
1 2 3 4 5 6 7 |
<script src="https://cdn.jsdelivr.net/npm/dayjs@1/dayjs.min.js"></script> <script src="https://cdn.jsdelivr.net/npm/dayjs@1/plugin/duration.js"></script> <script src="https://cdn.jsdelivr.net/npm/dayjs@1/locale/ja.js"></script> <script> dayjs.extend(window.dayjs_plugin_duration); dayjs.locale('ja'); </script> |
- 上3行で:Day.js本体・時間計算用のプラグイン・日本語化ファイルを読み込み
- 最後の
<script>:それらを実際に使えるように初期化設定
Flatpickrの読み込み部分▼
|
1 2 3 |
<link rel="stylesheet" href="https://cdn.jsdelivr.net/npm/flatpickr/dist/flatpickr.min.css"> <script src="https://cdn.jsdelivr.net/npm/flatpickr"></script> <script src="https://cdn.jsdelivr.net/npm/flatpickr/dist/l10n/ja.js"></script> |
<link>:カレンダーの見た目(デザイン)を読み込み<script>:カレンダー本体と、日本語化ファイルを読み込み
ライブラリはWeb上の“借り物”だからすぐに使える!
これらの読み込みは、すべてWeb上に公開されているファイルを呼び出しているだけ。
つまり、インストールもファイルダウンロードも不要で、たった数行で強力な機能が使えるのです。
外部ライブラリを読み込めば、ゼロから作る必要はないんです!
STEP2:CSSで見た目をおしゃれに整えよう!
HTMLでツールの“骨組み”を作ったあとは、CSSで色やレイアウトなどの見た目を整える作業に進みます。
これにより、使いやすく・わかりやすく・見た目もきれいなツールに仕上がります!
CSSコードを貼り付けよう
以下のCSSコードをindex.htmlファイルの <style> タグの中にコピー&ペーストしてください。
|
1 2 3 4 5 6 7 8 9 10 11 12 13 14 15 16 17 18 19 20 21 22 23 24 25 26 27 28 29 30 31 32 33 34 35 36 37 38 39 40 41 42 43 44 45 46 47 48 49 50 51 52 53 54 55 56 57 58 59 60 61 62 63 64 65 66 67 68 69 70 71 72 73 74 75 76 77 78 79 80 81 82 83 84 85 86 87 88 89 90 91 92 93 94 95 96 97 98 99 100 101 102 103 104 105 106 107 108 109 110 111 112 113 114 115 116 117 118 119 120 121 122 123 124 125 126 127 128 129 130 131 132 133 134 135 136 137 138 139 140 141 142 143 144 145 146 147 148 149 150 151 152 153 154 155 156 157 158 159 160 161 162 163 164 165 166 167 168 169 170 171 172 173 174 175 176 177 178 179 180 181 182 183 184 185 186 187 188 189 190 191 |
<style> /* CSS: ツール全体のデザイン */ body { font-family: 'Segoe UI', 'Hiragino Kaku Gothic ProN', Meiryo, sans-serif; display: flex; flex-direction: column; align-items: center; min-height: 100vh; background: linear-gradient(135deg, #e0eafc, #cfdef3); color: #333; margin: 0; padding: 30px 20px; box-sizing: border-box; } .container { background-color: #ffffff; padding: 40px 30px; border-radius: 15px; box-shadow: 0 10px 30px rgba(0, 0, 0, 0.1); width: 100%; max-width: 600px; text-align: center; } h1 { color: #2c3e50; margin-bottom: 10px; font-size: 2.2em; font-weight: 700; } .description { font-size: 1em; color: #555; margin-bottom: 25px; } .input-form { display: flex; flex-direction: column; gap: 15px; margin-bottom: 30px; } .input-group { text-align: left; } .input-group label { display: block; margin-bottom: 5px; color: #4a6a8a; font-weight: 600; } .input-group input { width: calc(100% - 24px); padding: 12px; border: 1px solid #c9d8e5; border-radius: 8px; font-size: 1em; box-sizing: border-box; background-color: #fff; cursor: pointer; } button { background-color: #007bff; color: white; padding: 14px 28px; border: none; border-radius: 8px; font-size: 1.1em; font-weight: 600; cursor: pointer; transition: background-color 0.3s ease, transform 0.1s ease; width: 100%; } button:hover { background-color: #0056b3; transform: translateY(-2px); } #error-message { color: #ff0000; font-weight: bold; margin-top: 10px; display: none; } /* カウントダウンリストのスタイル */ .countdown-list-container { width: 100%; margin-top: 20px; } .countdown-list h2 { font-size: 1.5em; text-align: left; margin-bottom: 20px; color: #2c3e50; border-bottom: 2px solid #007bff; padding-bottom: 5px; } .countdown-item { border-radius: 12px; padding: 20px; margin-bottom: 15px; box-shadow: 0 4px 12px rgba(0, 0, 0, 0.05); text-align: left; position: relative; } .countdown-item .event-name { font-size: 1.6em; font-weight: bold; margin-bottom: 5px; color: #2c3e50; } .countdown-item .target-date-text { font-size: 1.1em; font-weight: bold; color: #555; margin-bottom: 15px; } .countdown-item .countdown-display { font-size: 1.8em; font-weight: 700; color: #0056b3; white-space: nowrap; } .countdown-item .unit { font-size: 0.5em; font-weight: normal; } .countdown-item .delete-button { position: absolute; top: 20px; right: 20px; background: none; border: none; color: #ccc; font-size: 1.5em; cursor: pointer; transition: color 0.3s; } .countdown-item .delete-button:hover { color: #ff0000; } /* プログレスバーのスタイル */ .progress-container { width: 100%; height: 8px; background-color: #e9ecef; border-radius: 10px; margin-top: 10px; overflow: hidden; } .progress-bar { height: 100%; background-color: #28a745; border-radius: 10px; width: 0%; transition: width 0.5s ease-out; } /* テーマカラーのスタイル */ .theme-1 { background-color: #e3f2fd; border: 1px solid #bbdefb; } .theme-1 .event-name, .theme-1 .countdown-display { color: #1e88e5; } .theme-1 .progress-bar { background-color: #1e88e5; } .theme-2 { background-color: #e8f5e9; border: 1px solid #c8e6c9; } .theme-2 .event-name, .theme-2 .countdown-display { color: #43a047; } .theme-2 .progress-bar { background-color: #43a047; } .theme-3 { background-color: #fff3e0; border: 1px solid #ffe0b2; } .theme-3 .event-name, .theme-3 .countdown-display { color: #ff8f00; } .theme-3 .progress-bar { background-color: #ff8f00; } .theme-4 { background-color: #ffebee; border: 1px solid #ffcdd2; } .theme-4 .event-name, .theme-4 .countdown-display { color: #d32f2f; } .theme-4 .progress-bar { background-color: #d32f2f; } .theme-5 { background-color: #f3e5f5; border: 1px solid #e1bee7; } .theme-5 .event-name, .theme-5 .countdown-display { color: #8e24aa; } .theme-5 .progress-bar { background-color: #8e24aa; } /* レスポンシブ対応 */ @media (max-width: 600px) { body { padding: 20px 10px; } .container { padding: 30px 20px; } h1 { font-size: 1.8em; } .input-group input { font-size: 0.9em; } button { font-size: 1em; padding: 12px 24px; } .countdown-item .event-name { font-size: 1.4em; } .countdown-item .countdown-display { font-size: 1.8em; } .countdown-list h2 { font-size: 1.3em; } .countdown-item .delete-button { top: 15px; right: 15px; } } </style> |
コードの注目ポイント解説
このCSSコードには、ツール全体のスタイルがぎっしり詰まっています。
特に注目しておきたい部分をやさしく解説していきますね!
body:ページ全体の背景・文字スタイル
|
1 2 3 4 5 |
body { background: linear-gradient(135deg, #e0eafc, #cfdef3); font-family: 'Segoe UI', 'Hiragino Kaku Gothic ProN', Meiryo, sans-serif; color: #333; } |
ページの背景にグラデーションを設定し、読みやすい日本語フォントと色合いに整えています。
.container:ツール全体を包む白いボックス
|
1 2 3 4 |
.container { background-color: #ffffff; box-shadow: 0 10px 30px rgba(0, 0, 0, 0.1); } |
白い背景と影をつけることで、カードのように浮き上がったデザインになります。スマホでもPCでも見やすい形です。
.countdown-item:目標ごとの表示エリア
|
1 2 3 4 5 |
.countdown-item { border-radius: 12px; padding: 20px; position: relative; } |
ここは、登録された各目標の表示ブロック。position: relative; をつけておくことで、削除ボタンの位置指定ができるようになります。
.delete-button:「×」ボタンのデザイン
|
1 2 3 4 5 |
.delete-button { position: absolute; top: 20px; right: 20px; } |
目標の横にある「×」ボタンは、ここでデザインされています。
マウスを乗せると赤くなるアニメーションも含まれています!
.progress-bar:目標達成までの進捗バー
|
1 2 3 4 5 6 |
.progress-container { background-color: #e9ecef; } .progress-bar { background-color: #28a745; } |
開始日と目標日から計算して、進行度をバーで表示します。
色はテーマごとに変えられるようになっています(次の章で解説)。
.theme-:見た目を選べるカラーテーマ
|
1 2 3 |
.theme-1 { background-color: #e3f2fd; } .theme-2 { background-color: #e8f5e9; } .theme-3 { background-color: #fff3e0; } |
目標ごとに色を変えて、一覧表示でも見やすく・楽しくなる工夫です。
@media (max-width: 600px):スマホ対応の魔法
|
1 2 3 |
@media (max-width: 600px) { body { padding: 20px 10px; } } |
画面が小さくなったとき(主にスマホ)にレイアウトを整える“レスポンシブデザイン”もばっちり搭載!
ここまでの確認ポイント
・HTMLとCSSを保存した
・ブラウザで表示してみた
・レイアウトが整って、きれいな見た目になった!
この時点ではまだ動きません。
次のステップでJavaScriptを追加することで、カウントダウンなどの機能が動くようになります!
STEP3:JavaScriptで機能を実装する
JavaScriptは、Webページに「動き」や「機能」を加えるプログラミング言語です。
このステップでは、ツールの中核となる以下の3つの機能を実装していきます。
- カウントダウンの表示
- 入力したデータの保存
- 「×」ボタンでの削除
「目標追加ボタンを押すと一覧に表示され、リアルタイムでカウントダウンされる」仕組みをJavaScriptで実現します。
JavaScriptを使うと“ボタンを押したら動く” といったインタラクティブな操作が可能になります。
JavaScriptコードを貼り付けよう
以下のコードをコピーして、index.htmlファイルの最後の方にある <script> タグ内へ貼り付けてください。
|
1 2 3 4 5 6 7 8 9 10 11 12 13 14 15 16 17 18 19 20 21 22 23 24 25 26 27 28 29 30 31 32 33 34 35 36 37 38 39 40 41 42 43 44 45 46 47 48 49 50 51 52 53 54 55 56 57 58 59 60 61 62 63 64 65 66 67 68 69 70 71 72 73 74 75 76 77 78 79 80 81 82 83 84 85 86 87 88 89 90 91 92 93 94 95 96 97 98 99 100 101 102 103 104 105 106 107 108 109 110 111 112 113 114 115 116 117 118 119 120 121 122 123 124 125 126 127 128 129 130 131 132 133 134 135 136 137 138 139 140 141 142 143 144 145 146 147 148 149 150 151 152 153 154 155 156 157 158 159 160 |
<script> const STORAGE_KEY = 'countdownGoals'; let countdowns = []; let intervalId = null; // Flatpickrの初期化 flatpickr("#targetDate", { locale: "ja", dateFormat: "Y-m-d", minDate: "today" }); window.onload = function() { loadCountdowns(); if (countdowns.length > 0) { document.getElementById('countdown-list-container').style.display = 'block'; } else { document.getElementById('countdown-list-container').style.display = 'none'; } renderCountdowns(); startInterval(); }; function addCountdown() { const eventName = document.getElementById('eventName').value.trim(); const targetDate = document.getElementById('targetDate').value; const errorMessage = document.getElementById('error-message'); if (!eventName || !targetDate) { errorMessage.style.display = 'block'; return; } const newGoal = { id: Date.now(), name: eventName, target: targetDate, start: dayjs().format('YYYY-MM-DD') }; countdowns.push(newGoal); saveCountdowns(); renderCountdowns(); startInterval(); document.getElementById('eventName').value = ''; document.getElementById('targetDate').value = ''; errorMessage.style.display = 'none'; } function deleteCountdown(id) { countdowns = countdowns.filter(goal => goal.id !== id); saveCountdowns(); renderCountdowns(); if (countdowns.length === 0) { document.getElementById('countdown-list-container').style.display = 'none'; clearInterval(intervalId); intervalId = null; } } function saveCountdowns() { localStorage.setItem(STORAGE_KEY, JSON.stringify(countdowns)); } function loadCountdowns() { const storedData = localStorage.getItem(STORAGE_KEY); if (storedData) { countdowns = JSON.parse(storedData); } } function renderCountdowns() { const listElement = document.getElementById('countdown-list'); listElement.innerHTML = ''; if (countdowns.length > 0) { document.getElementById('countdown-list-container').style.display = 'block'; } countdowns.forEach((goal, index) => { const itemDiv = document.createElement('div'); const themeClass = `theme-${(index % 5) + 1}`; itemDiv.className = `countdown-item ${themeClass}`; itemDiv.id = `countdown-item-${goal.id}`; const startDate = dayjs(goal.start); const targetDate = dayjs(goal.target); const totalDurationMs = targetDate.diff(startDate, 'millisecond'); const elapsedDurationMs = dayjs().diff(startDate, 'millisecond'); let progressPercentage = 0; if (totalDurationMs > 0) { progressPercentage = Math.min(100, (elapsedDurationMs / totalDurationMs) * 100); } else if (dayjs().isAfter(targetDate, 'day') || totalDurationMs === 0) { progressPercentage = 100; } itemDiv.innerHTML = ` <div class="event-name">${goal.name}</div> <div class="target-date-text">${targetDate.format('YYYY年M月D日')}まで</div> <div class="countdown-display" id="countdown-display-${goal.id}"></div> <div class="progress-container"> <div class="progress-bar" id="progress-bar-${goal.id}" style="width: ${progressPercentage}%"></div> </div> <button class="delete-button" onclick="deleteCountdown(${goal.id})">×</button> `; listElement.appendChild(itemDiv); }); } function updateCountdowns() { countdowns.forEach(goal => { const countdownDisplay = document.getElementById(`countdown-display-${goal.id}`); const progressBar = document.getElementById(`progress-bar-${goal.id}`); if (!countdownDisplay || !progressBar) return; const targetDay = dayjs(goal.target); const now = dayjs(); const diffMs = targetDay.diff(now); if (diffMs <= 0) { countdownDisplay.innerHTML = '目標日を過ぎました!'; progressBar.style.width = '100%'; return; } const duration = dayjs.duration(diffMs); const days = Math.floor(duration.asDays()); const hours = duration.hours(); const minutes = duration.minutes(); const seconds = duration.seconds(); countdownDisplay.innerHTML = ` ${days}<span class="unit">日</span> ${hours}<span class="unit">時間</span> ${minutes}<span class="unit">分</span> ${seconds}<span class="unit">秒</span> `; const startDate = dayjs(goal.start); const totalDurationMs = targetDay.diff(startDate, 'millisecond'); const elapsedDurationMs = now.diff(startDate, 'millisecond'); let progressPercentage = 0; if (totalDurationMs > 0) { progressPercentage = Math.min(100, (elapsedDurationMs / totalDurationMs) * 100); } else if (dayjs().isAfter(targetDay, 'day') || totalDurationMs === 0) { progressPercentage = 100; } progressBar.style.width = `${progressPercentage}%`; }); } function startInterval() { if (intervalId) return; updateCountdowns(); intervalId = setInterval(updateCountdowns, 1000); } </script> |
コードのポイント解説
ここからは、コードの仕組みをわかりやすく説明していきます。
ページ読み込み時の処理
|
1 2 3 4 5 |
window.onload = function() { loadCountdowns(); renderCountdowns(); startInterval(); }; |
- ページを開いたときに1度だけ実行されます。
- 保存していた目標を読み込み、カウントダウンを表示し、1秒ごとの更新も開始します。
ページが開いた瞬間に、自動でカウントダウンが始まるのはこの関数のおかげです!
目標を追加する処理
|
1 2 3 |
function addCountdown() { // 入力された値を取得し、カウントダウンに追加 } |
- 「目標イベント名」「目標日」の入力内容を読み取り、新しい目標として追加します。
- 日付やイベント名が未入力の場合は、エラーメッセージが表示されます。
保存・読み込みの仕組み
|
1 2 |
localStorage.setItem(); localStorage.getItem(); |
- ブラウザにデータを一時保存するための機能「localStorage」を使っています。
- ページを閉じても、目標データは残ります。
localStorageは、JavaScript初心者が扱いやすい“ミニデータベース”のようなもの。自動保存が簡単にできますよ!
カウントダウンの描画処理
|
1 2 3 |
function renderCountdowns() { // HTMLに目標一覧を動的に表示 } |
- 入力されたデータをHTMLの表示用に変換します。
- カラフルなデザインや、プログレスバーもこの中で生成されます。
残り時間を1秒ごとに更新
|
1 2 3 |
function updateCountdowns() { // 各目標の残り時間を再計算して表示を更新 } |
dayjsライブラリを使って、残り日数・時間・分・秒を計算しています。- プログレスバーも合わせて更新されます。
1秒ごとに時間が更新される“生きてる画面”にしてくれているのがこの関数です!
削除ボタンの処理
|
1 2 3 |
function deleteCountdown(id) { // 「×」をクリックすると、その目標を削除 } |
- それぞれの目標の右上にある「×」ボタンで、削除できる仕組みです。
- 消したあとは、保存内容も自動で更新されます。
Day.jsの使い方と活躍ポイント
このツールでは、日時の処理にJavaScriptのライブラリ「Day.js」を使っています。
標準のJavaScriptでは少し面倒な日付操作が、Day.jsでとても簡単にできるようになります。
dayjs().format('YYYY-MM-DD')
現在の日付を「2025-08-03」のように表示
|
1 |
start: dayjs().format('YYYY-MM-DD') |
「目標をいつ登録したか」を記録するために使っています。
dayjs(goal.target).diff(now)
目標日と現在の差をミリ秒単位で計算
|
1 |
const diffMs = targetDay.diff(now); |
「あと何日?」を計算するための、基礎になる値です。
dayjs.duration(diffMs)
ミリ秒の差を、日・時間・分・秒に変換可能なオブジェクトに
|
1 |
const duration = dayjs.duration(diffMs); |
カウントダウンの表示に必要な「単位ごとの時間」を取り出す準備です。
.asDays() / .hours() / .minutes() / .seconds()
durationから各時間単位を取り出す
|
1 2 3 4 |
const days = Math.floor(duration.asDays()); const hours = duration.hours(); const minutes = duration.minutes(); const seconds = duration.seconds(); |
表示エリアに「あと○日○時間○分○秒」と表示するために使っています。
Day.jsを使うことで、コードが短く・わかりやすくなるだけでなく、日本語の表示や未来日との比較など、実用的な機能もとても簡単に実装できます。
完成&動作確認しよう!
コードを保存したら、ブラウザで index.html を開いてみましょう!
- 「目標イベント名」と「目標日」を入力
- 「目標を追加!」ボタンをクリック
- カウントダウンがリアルタイムで始まる
そして、目標は自動で保存され、次に開いたときにも表示されます!
お疲れさまでした!これで自分専用の目標管理ツールが完成です。
おすすめの学習リソース|HTMLやJavaScriptをさらに学びたい人へ
「もっと作ってみたい!」「コードの意味をもっと理解したい!」と思った方のために、
初心者にもやさしく学べるおすすめの書籍と講座をご紹介します。
おすすめの書籍
『確かな力が身につくJavaScript超入門』(SBクリエイティブ)
- JavaScriptを基礎から丁寧に学べる入門書。
- 実践的なサンプルも豊富で、今回のツールのような小さなアプリを自分で作れるようになります。
- 初学者にぴったりの1冊です。

『スラスラわかるHTML&CSSのきほん』(SBクリエイティブ)
- Web制作初心者に最適な入門書。HTMLとCSSの仕組みをやさしく解説。
- これからWebページを作ってみたい方にぴったり。
- レイアウトの基本やスタイルの調整方法など、実践的に学べます。
おすすめのオンライン講座
Udemy|世界最大級のオンライン学習プラットフォーム
世界中で利用されるオンライン学習サイト。
HTML、CSS、JavaScriptの入門から応用まで、高評価の講座が数百種類揃っています。
初心者でも動画を見ながら手を動かせるので、挫折しにくいのが魅力です。
まとめ:小さな成功体験が、次の学びにつながる
お疲れさまでした!
これで、あなただけの 「目標達成応援カウントダウンツール」 が完成しました
今回の記事を通じて、あなたは以下のことを学びました。
- HTML: ツールの骨組みを作る方法
- CSS: デザインを整え、見やすくする方法
- JavaScript: 動きや機能をつけ、実用的なツールにする方法
コードをコピペするだけでなく、それぞれの役割と仕組みを少しでも理解できたなら、それは大きな一歩です。
プログラミング学習では、このように小さな作品を一つ完成させることの積み重ねが、何よりも大切です。
今回の成功体験を自信に変えて、ぜひ次のステップに進んでみましょう。
あなたのプログラミング学習が、
これからもっと楽しく、前向きなものになるよう願っています!
関連記事
【実際のカウントダウンタイマーの動作を試してみたい方はこちらからどうぞ】▼